AzTech Excel Add-In – FAQs
*Please contact AzTech IT if these solutions do not work.
- 1. How do you install the AzTech Excel Add-In?
- Download the ‘AzTech.XLA’ from the Download and Documents page (login required).
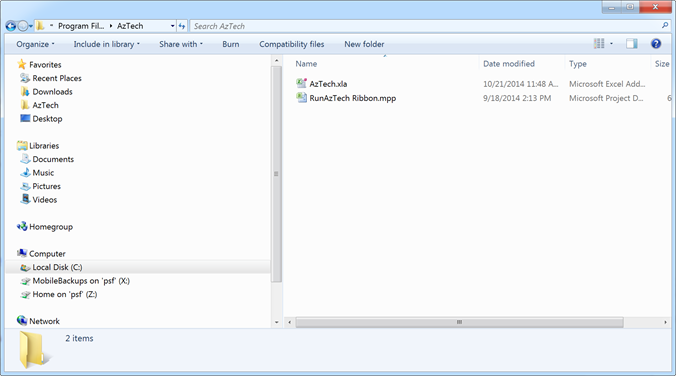
- Generate an “AzTech” folder within your local drive Program Files (this folder may already be there for existing AzTech tool users). An example of the resulting file path is: C: (local drive)\Program Files\AzTech
- Move the “AzTech.XLA” file into the newly created “AzTech” folder.
- Note: This is the same folder that houses the required Run!AzTech Ribbon.MPP file for use with Run!AzTech Ribbon
- Close out of this window and Open Excel
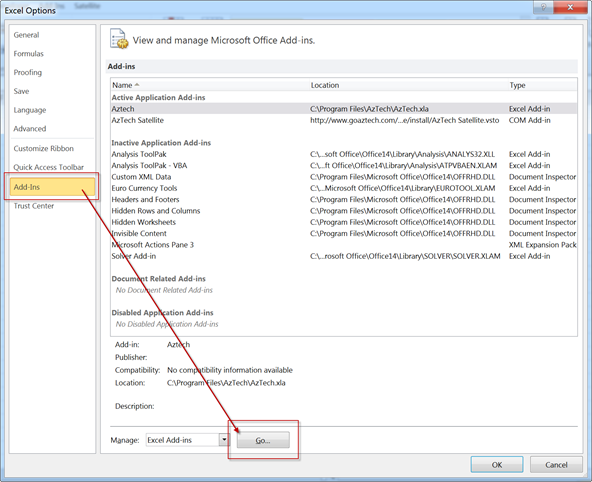
- In Excel, click on File > Options

- An Excel Options box will appear. Click on “Add-Ins”, then ensure that the “Excel Add-Ins” option is selected from the drop down in the “Manage” section (Should be by default). Once selected, click “Go”.
- An Add-Ins box will appear. Click on the “Browse” button and navigate to the AzTech folder created above (example – C:(local drive)\ Program Files\AzTech) and select “AzTech.XLA”, then click “OK” from your browse dialogue box.
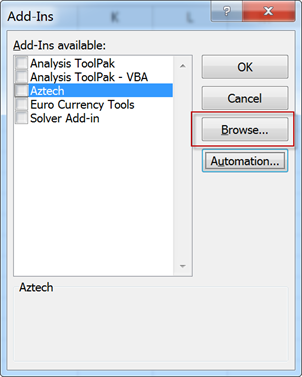
- In the Add-Ins box, the AzTech will now appear and automatically be checked. If AzTech is unchecked, please check it and click OK.
- You will now noticed a tab on your Excel ribbon labeled Add-Ins. Click on the tab and you will see the AzTech Excel Add-in accessible (shown below).
- Ready to use!